5 Recipes That use Oyster Sauce


Oyster sauce is a rich and savory dark sauce used in a range of oriental dishes. It's an all-purpose sauce made using the finest oyster extracts. If you've ever eaten excellent Chinese cuisine, you'll be familiar with its unforgettable taste. This article gives you five recipes that use oyster sauce to enhance the natural flavor of all the ingredients. 

Stir-fried beef with oyster sauce


If you want a dish that can be enjoyed as an easy dinner or on weeknights or a treat on the weekend with some spring roll, then what about stir-fried beef with oyster sauce. This recipe is easy, flavorsome, and authentic; it gives you the great taste of Chinese cuisine without the delivery charge. The recipes use succulent lean fillet of beef, soy sauce, oyster sauce, groundnut oil, and fresh mint leaves. It can be served with fluffy boiled rice or fried rice if you prefer. 

Pork and Potato Hash with Oyster Mushrooms


The dish is perfect for a dinner party or family gathering. It's a large bowl containing a mixture of delicious pork, succulent baby potatoes, and decadent oyster mushrooms. The pork is prepared using a combination of oyster sauce, soy sauce, and Worcestershire sauce. The black pepper and chilli flakes add extra flavor and the fried eggs give the dish a unique twist. Pork and potato hash with oyster mushrooms can be enjoyed with red wine and jasmine rice; why not give it a try this Christmas. 


Braised Shin of Beef With hot and Sour Shredded Salad


Here is a stew dish that's packed with flavor and can be enjoyed as a snack, side, or main meal. The point of a stew is for flavor, not form, and the braised shin of beef doesn't disappoint on that front. It contains succulent beef that's prepared with ginger root, wine, oyster sauce, and cinnamon sticks, and the salad contains spring onions, chili flakes, and coriander. This dish offers a superb contrast of flavors and textures, with the crunchy salad the perfect complement to saucy beef. 


Firecracker Prawns with Stir-fried Greens


Do you love a flavorsome protein-packed snack or side for a special evening in or a family gathering? If so, you need look no further than Firecracker prawns with stir-fried greens. This dish is not only bursting with flavor; it's also easy to make and very healthy. The dish uses tiger prawns prepared with spring onions, chilies, and oyster sauce. You can serve it with stir-fried greens made of pakchoi, ginger, and soy sauce. Light up your Christmas Dinner table this year with firecracker prawns. 

General Tso's Chicken


If you're a fan of the classic American take-out recipe General Tso's chicken, you'll love this recipe that brings more of the original into your home. This recipe is a little more fiery than the original but still utterly delicious. The chicken thighs are prepared using chilies, wine, and peanuts, the sauce is made from soy sauce, oyster sauce, and chili sauce; and the noodles are made from egg noodles, oyster sauce, and Chinese mushrooms. Imitate the great American recipe in your own kitchen with this exciting dish. 

Share:

My 2020 Advent Calendar

*I was gifted this item by Yankee Candle*

While an advent calendar may be the perfect excuse to have a little bit of chocolate every day, but if you are following a healthy eating plan it could be extra calories you don't need.

I've often made my own advent calendars, but this year I was lucky enough to be gifted this amazing Yankee Candle Advent Calendar. 

I absolutely love candles and have at least 3 in every room of the house, so the idea of opening a door every day to a new candle is very exciting! 

Featuring warm spices and crisp winter aromas, this charming gift set is perfect for anyone, offering a fragranced twist on the traditional advent calendar.

Check out my Insta Stories for updates as I open it!


It includes 35 items listed below:

Small Jar Candles:

1 x Holiday Hearth 
1 x Singing Carols
1 x Unwrap The Magic

Votive Candles:

1 x Singing Carols 
1 x Holiday Hearth
1 x Vanilla French Toast or Pecan Pie Bites
1 x Christmas Morning Punch 
1 x Christmas Magic 
1 x Christmas Eve 
1 x Warm Cashmere
1 x Cinnamon Stick 
1 x Snowflake Cookie 
1 x Christmas Cookie

Tea Light Candles:

12 x Christmas Eve
1 x Glittering Star
1 x Red Apple Wreath
1 x Cranberry Ice
1 x Candlelit Cabin
1 x Unwrap The Magic (Gift Set Exclusive)
1 x Angel's Wings

Accessories:

1 x Wick Trimmer
1 x Candle Snuffer
1 x Votive Holder
1 x Tea Light Holder


Share:

Iberian Ham Masterclass | Gifted

*I was gifted the class and samples, however all thoughts are honest and my own*

Have you heard of Iberian ham? Iberian Ham is produced from black Iberico pigs using traditional and time-honoured methods.

This unique culinary gem is characterised by its beautiful ruby red colour meaning the meat is oily and tender, giving it the delicious melt-in the mouth flavour. 

The #HamPassionTour, has been set up by Iberian hams from Spain and the European Union to help promote this wonderful ham. I was invited to experience the masterclass which was being held at the University of West London via Zoom. 

Iberian Ham is known for being the most expensive and premium ham and it is prized by top chefs and food lovers around the world for its high-quality and distinct flavour.

It is created within a sustainable production model, where food safety, animal welfare, traceability and environmental sustainability are fundamental factors.


Last year 7 million Iberian hams were produced. The hams are left to cure for 3-4 years in drying chambers, which helps create this distinctive flavour.


You may have seen a whole leg of ham displayed in top restaurants, where the ham is sliced off to serve. It is an amazing centrepiece at the table, as well as extremely delicious.

We were shown how to correctly cut the leg down to slice the perfect ham by a master carver. We were also shown the correct way to how to correctly plate ham. 


I was sent some precut ham, which is good as the master carver made it look very easy, but I don't think I would be very good at cutting it myself!

The ham is absolutely delicious, and perfect to enjoy on a night in at home. 


The masterclass was very enjoyable and I will certainly enjoy my Iberian ham.

Share:

Green Bean Casserole

Green Bean Casserole is one of my favorite side dishes to have during the holidays! It is a dish that my family loves and it always has an appearance on our holiday table! This recipe is from Optavia's Pinterest page and it has quickly become my favorite lightened up version of Green Bean Casserole!


This recipe uses a mixture of plain Greek yogurt, sour cream, sauteed mushrooms and onions instead of cream of mushroom soup to make this recipe healthier than the classic version. It also uses grated parmesan cheese instead of french fried onions to add a nice golden topping with a slight crunch. Give this lighter version a try!


Green Bean Casserole

Ingredients:
1 pound bag frozen whole green beans
Cooking Spray
2 cups mushrooms, chopped
1/4 cup diced yellow onions
1 tsp minced garlic
3/4 cup nonfat plain Greek yogurt
1/4 cup reduced fat sour cream
1 tsp cornstarch
1/2 packet stevia
1/2 tsp salt
1/4 tsp black pepper
1/2 cup reduced fat, shredded cheddar cheese
2 tbsp grated parmesan cheese

Directions:
Preheat oven to 350 degrees.
Microwave green beans according to package directions. Drain any excess water from the green beans.
Lightly spray a medium sized skillet with cooking spray, and heat over medium heat. Add mushrooms, onions, and garlic. Cook until tender, about 5 to 7 minutes. Combine mushroom mixture with green beans in a medium sized bowl. Let cool.
Meanwhile, add Greek yogurt, sour cream, cornstarch, stevia, salt, and pepper to cooled green beans. Toss to coat vegetables evenly with sauce. Add cheddar cheese and stir until combined.
Spread into a lightly greased 9 inch casserole dish. Top with parmesan cheese, and bake until topping is golden brown, about 30 to 35 minutes.

Makes 4 Servings
Each serving provides
1/4 Leaner, 3 Greens, 1/2 Healthy Fat, and 3 Condiments

Serve with 4.5 ounces of turkey as 3/4 Leaner and add 1/2 Healthy Fat

Want to use canned french style green beans? Use 2 (14 ounce) canned green beans plus 1 more serving from a third for a total of 8 Greens. Make sure to drain the green beans well! With 2 cups of mushrooms, you will have a total of 12 Greens with 3 Greens per serving.


Share:

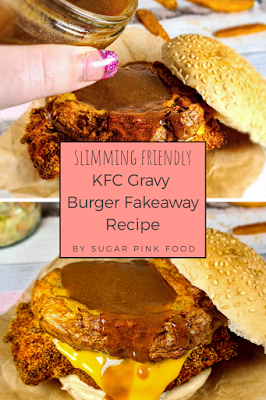
KFC Gravy Burger Fakeaway Recipe | Slimming Friendly

KFC Gravy Burger Fakeaway Recipe slimming world friendly low syn, fakeaway recipe, fakeaway food, fakeaways


My Slimming World friendly KFC Fakeaway Recipe: Gravy Burger Recipe

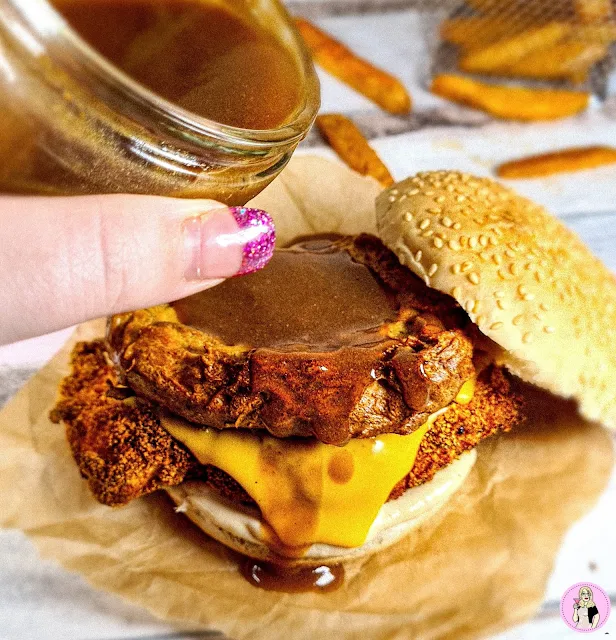
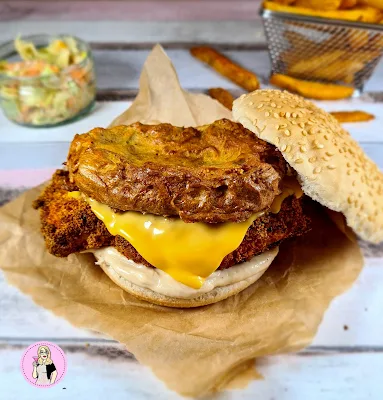
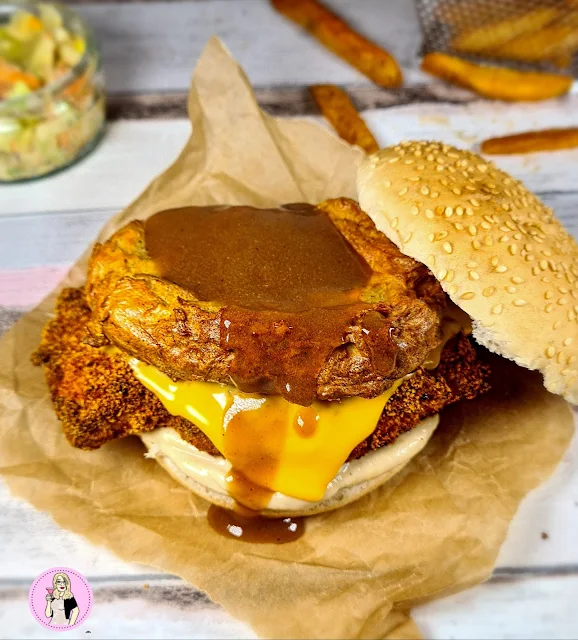
Have you seen the KFC Gravy Burger Advert yet? It is the 2020 offering from KFC. A KFC fillet burger, teamed with creamy gravy mayonnaise, cheese & topped with a cupped hash brown made to be filled with lashings of gravy.

I love a good KFC Fakeaway Recipe!

The real thing can set you back lots of syns and calories, but my fakeaway version can save you both calories and syns!

As the Queen of the Fakeaway, I thought I better give this one a go! I have loads of other KFC Fakeaway Recipes too if you fancy something else. 

I was surprised how well this turned out, it was absolutely delicious!

KFC Gravy Burger Fakeaway Recipe slimming world friendly low syn, fakeaway recipe, fakeaway food, fakeaways

The key to this burger, is making sure the hash browns have a 'well' in them to hold all the gravy, and of course, some deliciously rich, thick gravy.

I put a lot of my favourite KFC recipes together for this one. 

As for the gravy mayo, I wasn't too sure about that one! I mixed some of the gravy together with mayo, and it was surprisingly tasty!

KFC Gravy Burger Fakeaway Recipe slimming world friendly low syn, fakeaway recipe, fakeaway food, fakeaways

Can I reduce the syns or calories?

I used a proper white bun for my burger which was 7 syns, but if you are following Slimming World you could use a Schar Gluten Free Ciabatta Roll which can be used as a healthy extra. 

You could also leave out the bun, swap for a wholemeal bun or gluten free bun.

KFC Gravy Burger Fakeaway Recipe slimming world friendly low syn, fakeaway recipe, fakeaway food, fakeaways

This tasted like a real treat, even though it was far fewer calories, syns and fat than the real thing.

The beauty of this is that you can add as much or as little gravy as you like!


Fancy some more recipes?

Like the look of this recipe? I have loads more for you to look through as well! Click the links below for more:

KFC Gravy Burger Fakeaway Recipe slimming world friendly low syn

Slimming World Friendly Dinner Recipes

 Slimming World Friendly Breakfast 

Slimming World Friendly Lunch Recipes 

 Slimming Friendly Fakeaways


KFC Gravy Burger Fakeaway Recipe

Extra Easy Syn Value: 4.5 syns (not including the bun! Either use a HEb roll/bun or add syns)

Healthy Extras: None

Recipe makes 2 chicken breasts, 2 large hash browns

Share:

Tips for Cooking in a Moroccan Tagine

Morocco is famous for delicious, spicy, slow-cooked meat and fish dishes. Just thinking about this incredible food makes my mouth water.


Moroccan cooking frequently takes advantage of a one-pot solution: the tagine.

The word tagine is used to describe both the food and the dish the meal is prepared in. This dish is a beautiful and unique item with a wide, shallow base and cone-shaped top. The two pieces seal together tightly to retain heat, moisture, and flavor.

Traditional tagines are made of unglazed clay or earthenware that adds a rustic and earthy flavor to your food. Today, tagines can be made from a variety of materials such as metal, cast iron, or flameproof glazed ceramic.

Below, you’ll find our top tips for cooking in a Moroccan tagine, so you can create incredible flavors at home.

1. Season


When you purchase a tagine, the first thing you must do is season it. This doesn’t mean salt and pepper; it refers to the process of sealing the pot and strengthening it against heat.

To season your tagine, soak the lid and base for two hours before thoroughly drying and brushing with olive oil. Once brushed, place the tagine in the oven and bake at 300’F for two hours before turning the oven off and allowing the pot to cool inside. Once finished, wash the tagine, then brush it again with olive oil.

2. Base


Once your tagine has been seasoned, the next thing to do is arrange your base layer to protect your meats and prevent sticking. This involves creating a bed from chopped onions and can also include celery, carrots, or small bamboo sticks in addition to garlic.

3. Oil


Oil is the foundation of the rich sauces that tagines are famous for and is added on top of your base layer.

In Moroccan cooking, you’ll often find chefs use a combination of olive oil and vegetable oil in their dishes. This can be for two reasons: firstly, small quantities of extra virgin olive oil can produce intense flavors, and secondly, vegetable oil is considerably cheaper!

4. Meat, Fish, Veggies


After arranging your base layer and adding oil, place your meat in the center of the tagine. This can be red meat, poultry, fish, or vegetarian options.

Some recipes will call for the meat to be browned first. If you wish to do this, use a separate pan as tagines should not be used at high temperatures.

Your vegetables should then be placed around the perimeter of the meat and stacked attractively.

5. Spices


The next step in a traditional Moroccan tagine is to season (we really do mean seasoning this time!) the dish. You can pick up pre-mixed Moroccan spices from most stores or make your own.

Moroccan spice blends include salt and pepper, paprika, cumin, ginger, cinnamon, cloves, and cayenne pepper. Sweet Pea and Saffron also recommend adding a little sugar.

Sprinkle your spice mixture over the meat and vegetables, concentrating on the onions for a full flavor.

6. Garnish


Add more colors and flavor with bell peppers, lemons, olives, chili peppers, jalapenos, and/or herbs before creating your sauce.

7. Liquid


Before you place your tagine on the heat, add some water, stock, or broth. It’s vital to add liquids slowly so that you don’t wash away the spices, and the liquid should go in cold to avoid thermal shock.

8. Cook


Tagines involve slow cooking, so you’ll need to cook at a medium to low heat and allow the dish to simmer gently. Be careful not to place your tagine directly on the heat because this can cause cracking. 

Check the tagine after approximately two hours of simmering. If you need to, add another ¼ cup of water for the last hour.

10. Serve


Because tagines are so beautiful, many people choose to use them as a serving dish as well as a cooking pot. Some modern tagines-pot will incorporate an easy-grip rim to aid in carrying the pot from the stove to the table.

11. Cleaning and Storage


Now you know how to cook in a Moroccan tagine, we’ll leave you with just a few more quick tips to help you get the most out of this dish:

Always hand wash your tagine after every service, and never place it in the dishwasher

Check your tagine is completely dry before putting it away

Leave the lid slightly ajar to allow air circulation and prevent too much flavor build-up

Following these tips will ensure your tagine lasts as long as possible, so you can create stunning dishes for years to come.

*This is a contributed post*
Share:

Chicken Katsu Curry | Zanussi Fakeaway Recipe | AD

 *This post was created in Partnership with Zanussi, and  I was gifted this oven, however, all thoughts and opinions are honest and my own.*

I have some exciting news...I am delighted to announce that I am partnering with Zanussi UK on their Fakeaways campaign! I will be showing you how to create delicious, healthy Fakeaways using my brand new Zanussi AirFry oven!


If you follow me, you will know that I love to create delicious but healthy versions of my favourite takeaways, also known as the Fakeaway. If you haven't seen it already, check out my Crispy Chilli Beef Fakeaway Recipe

I was even dubbed the 'Queen of the Fakeaway' by the press, back in lockdown!

By making your own Fakeaway favourites you're not only saving money but saving on calories too. 

Zanussi provides clever, simple, solutions for ease of use and enjoyment at home, and it is with great excitement that I can say that I have partnered up with them to share some brand new Fakeaway recipes, which I created using their  Zanussi ZOPNA7X1 oven with AirFry technology. 

Gone are the days where I need to store a big, bulky extra air frying unit. The Zanussi oven has it all built-in one. This makes life so much easier and is perfect for making your own Fakeaways. 

Scroll down for the full recipe & instructions


Chicken Katsu Curry slimming world curry

This technology also significantly speeds up the cooking process by up to 20% so your family favourites will be ready to enjoy in no time at all.

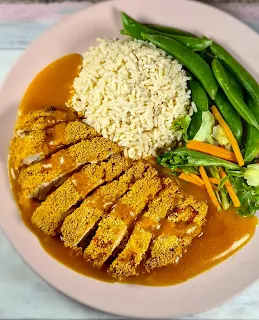
Chicken katsu curry is a super popular Japanese dish that loads of Japanese delivery places offer on their menu.

The 'katsu' is actually the chicken part, which is breadcrumbed with panko breadcrumbs and fried. Of course, this is fakeaway style though, so I will be AirFrying mine! It's usually served with Jasmine rice and a curry sauce.

The curry sauce is actually veg based, too! I've made this dish with as few calories as possible, so cut out any oils or butter.

The perforated AirFry tray is perfect for recreating any fried chicken dish, making it super crispy too.

Chicken Katsu Curry slimming world curry


See Also:


Chicken Katsu Curry Recipe 


Chicken Katsu Curry slimming world curry


You will need:

4 skinless chicken breasts
240g panko breadcrumbs (or wholemeal breadcrumbs)
1 egg, beaten
Salt and freshly ground black pepper
1 large onion, chopped
1 courgette, chopped
2 carrots, chopped
4 cloves of garlic, crushed
1 tsp fresh ginger
1 tsp turmeric
2 tsp cumin
2 tsp coriander
1 tsp chilli powder
1 tbsp sweetener
1 tbsp soy sauce
1 litre chicken stock
1 bay leaf
2 tbsp fat-free fromage frais
Low-calorie cooking spray

Jasmine rice to serve

Method:


Preheat your Zanussi oven to 180°C on the air fry setting.

Place each chicken breast in some clingfilm and flatten with a rolling pin or meat tenderiser to get a flatter breast. This helps with the cooking. Once flattened, remove from the cling film.

Season the breadcrumbs with salt and freshly ground black pepper. 

Dip the chicken breast in the egg mix, then coat with breadcrumbs. Place in the AirFry tray and spray with some more low-calorie cooking spray. 

Meanwhile, spray a saucepan with low-calorie cooking spray and add the onion, garlic and ginger and cook for 3 minutes or until the onion is softened. 

Add the carrots and courgette and lightly fry for a further 4-5 minutes.

Add the turmeric, cumin, coriander, chilli powder and sweetener and evenly coat the vegetables. Add the stock, soy sauce and bay leaf and bring to the boil. Reduce the heat and simmer for 30 minutes.

Add the chicken to the oven, and cook for 15-20 minutes or until the chicken is cooked through and the outside is golden.

Remove the bay leaf from the sauce and pour the contents into a blender. Blitz until it becomes a thick, smooth sauce and stir in the fromage frais.

To serve slice the chicken breast into pieces, spoon over the curry sauce and serve with steamed rice.

Notes:

If you don't have a Zanussi oven, you can follow this recipe and lay the strips on a baking tray, turning them regularly.

All images and content on Sugar Pink Food is copyright protected.

If you wish to share this recipe, then please do so by using the share options provided. Do not screenshot or post recipe or content in full

This post was created in Partnership with Zanussi, and  I was gifted this oven, however, all thoughts and opinions are honest and my own.
Share:

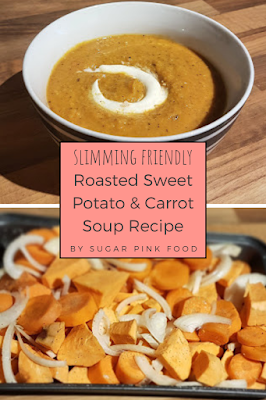
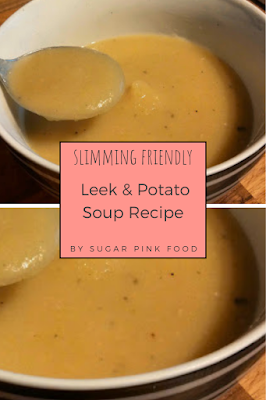
Best Slimming World Friendly Soup Recipes

Looking for some Slimming World Friendly Soup Recipes? I've got you covered! I love making soups, especially when the weather gets a bit cooler and autumn starts to hit.

slimming world soup recipes


I have posted quite a few Slimming World Friendly Soup recipes, so I thought I would put them all together in a post for you!

There are some slow cooker recipes, and some more traditional recipes too.

Just click the image below to be directed to the soup recipe.


slimming world soup recipes slimming world soup recipes


slimming world soup recipes slimming world soup recipes


slimming world soup recipes slimming world soup recipes


slimming world soup recipes slimming world soup recipes


slimming world soup recipes


Fancy some more recipes?

Like the look of this recipe? I have loads more for you to look through as well! Click the links below for more:


Slimming World Friendly Dinner Recipes

 Slimming World Friendly Breakfast 

Slimming World Friendly Lunch Recipes 

 Slimming Friendly Fakeaways


Share:

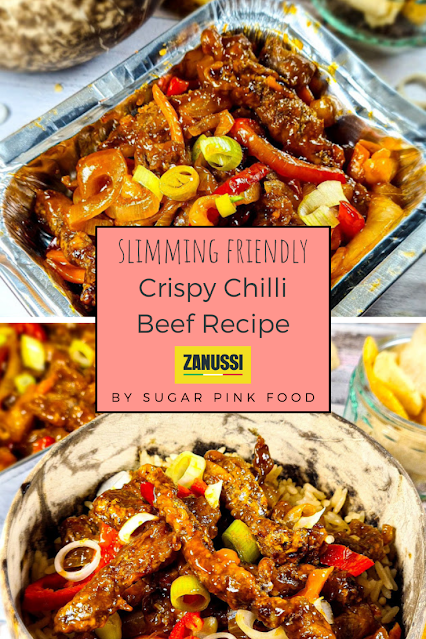
Crispy Chilli Beef | Zanussi Fakeaway Recipe | AD

*This post was created in Partnership with Zanussi, and  I was gifted this oven, however, all thoughts and opinions are honest and my own.*

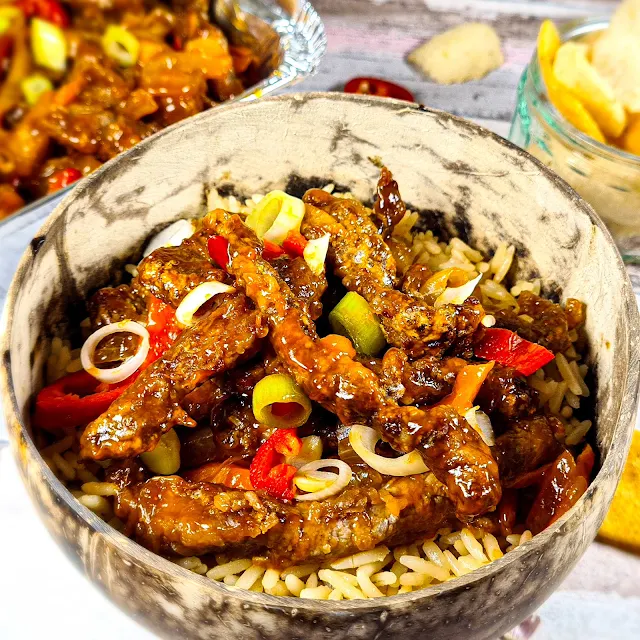
Crispy Chilli Beef is a classic Chinese takeaway dish that I absolutely love. Thanks to the Zanussi Airfry technology, this can be easily created at home with very little effort.

Scroll down for the full recipe & instructions

I have some exciting news...I am delighted to announce that I am partnering with Zanussi UK on their Fakeaways campaign! I will be showing you how to create delicious, healthy Fakeaways using my brand new Zanussi AirFry oven!

If you follow me, you will know that I love to create delicious but healthy versions of my favourite takeaways, also known as the Fakeaway. 

I was even dubbed the 'Queen of the Fakeaway' by the press, back in lockdown!

By making your own Fakeaway favourites you're not only saving money but saving on calories too. 

Zanussi provides clever, simple, solutions for ease of use and enjoyment at home, and it is with great excitement that I can say that I have partnered up with them to share some brand new Fakeaway recipes, which I created using their  Zanussi ZOPNA7X1 oven with AirFry technology. 


The AirFry technology helps you to achieve perfectly crisp fried foods, without compromising on taste or health.

Gone are the days where I need to store a big, bulky extra air frying unit. The Zanussi oven has it all built-in one. This makes life so much easier and is perfect for making your own Fakeaways. 

The maximised airflow promotes even cooking from all sides, even from below, helping achieve that desirable crisp, golden texture. 

This technology also significantly speeds up the cooking process by up to 20% so your family favourites will be ready to enjoy in no time at all.

Follow me on Instagram to see my recipe pictures first!

Just click here to find my profile!

With this recipe, the Zanussi air fry technology is absolutely perfect for creating the crispy beef strips, and you may even be able to fool your friends into thinking you ordered it in!


Crispy Chilli Beef Recipe


You will need:

500g lean rump steak, cut into thin strips
200ml beef stock (Can be made up from a cube)
2 tbsp sweet chilli sauce
2 tbsp tomato puree
2 tbsp Worcestershire sauce
1 tbsp clear honey
1 tbsp lemon juice 
1/2 teaspoon ginger paste
2 tbsp cornflour
1 red pepper deseeded and sliced
1/2 onion sliced
5 spring onions chopped
1 tsp chilli flakes
sea salt & freshly ground black pepper

Method:

For best results use the Zanussi oven I mention above. If you don't have this, you can use an air fryer, or frying pan instead.

Switch your oven onto the AirFry setting, and set the temperature to be 180 degrees.

Flatten out your rump steak, and cut into thin strips.

Coat each strip in cornflour, and then lay them out on the Zanussi AirFry tray.

Cook in the oven for 10 minutes. Thanks to the Zanussi tray, there's no need to turn the strips halfway through.

Slice up the carrot, onion, garlic pepper and add to a frying pan. Add the ginger and fry on a low temperature for approximately 5 minutes.

Make the sauce coating by mixing the sweet chilli sauce, tomato puree, chilli flakes, Worcestershire sauce, clear honey, lemon juice and a little of the stock until it creates a glaze.

When the strips have been in for 10 minutes, remove them from the oven. Drop them into the bowl with the sauce and mix around. Place the strips back on the tray and cook for another 5 minutes.

Add the rest of the sauce to the pan with the carrots and peppers and cook for the 5 minutes the strips are in the oven.

Remove the strips and add them to the pan with the peppers, onions and carrots. Mix well.

Sprinkle on the spring onions to serve.

Notes:

If you don't have a Zanussi oven, you can follow this recipe and lay the strips on a baking tray, turning them regularly.

All images and content on Sugar Pink Food is copyright protected.

If you wish to share this recipe, then please do so by using the share options provided. Do not screenshot or post recipe or content in full

This post was created in Partnership with Zanussi, and  I was gifted this oven, however, all thoughts and opinions are honest and my own.
Share:

Popular Recipes

Labels

Blog Archive

Featured Post

Recipe Sweet Spicy Tofu

Tofu, with its versatile nature, offers a canvas for culinary creativity. One delightful rendition of this ingredient is the Spicy Sweet Tof...