Chicken Stir Fry With Rice Noodles

Chicken Stir Fry With Rice Noodles

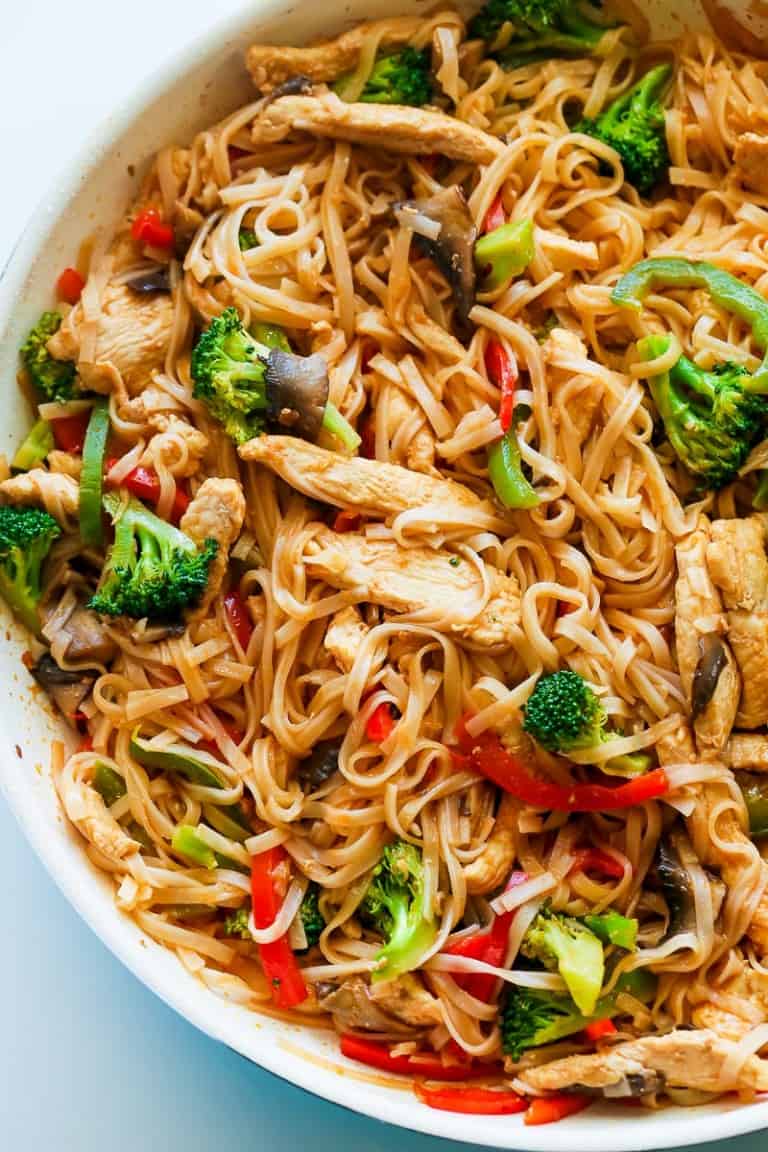
Chicken Stir Fry With Rice Noodles: A Quick and Easy Meal

Chicken Stir Fry With Rice Noodles

Chicken stir fry with rice noodles is a quick and easy meal that is perfect for a busy weeknight. This dish is packed with flavor and can be made with a variety of vegetables. It is also a great way to use up leftover chicken.

The key to making a great chicken stir fry is to use a good quality sauce. You can either make your own sauce or use a store-bought sauce. If you are using a store-bought sauce, be sure to taste it before you add it to the stir fry. You may want to add some additional ingredients to taste, such as honey, soy sauce, or sesame oil.

Ingredients

  • 1 pound boneless, skinless chicken breasts
  • 1 tablespoon cornstarch
  • 1 teaspoon ground black pepper
  • 1/2 cup soy sauce
  • 1/4 cup chicken broth
  • 1/4 cup brown sugar
  • 1 tablespoon rice vinegar
  • 1 teaspoon sesame oil
  • 1 tablespoon minced garlic
  • 1 tablespoon minced ginger
  • 1 red bell pepper, cut into 1-inch pieces
  • 1 green bell pepper, cut into 1-inch pieces
  • 1 onion, cut into 1-inch pieces
  • 1 pound rice noodles, cooked according to package directions
  • Chopped green onions, for garnish

Instructions

  1. Cut the chicken into 1-inch pieces. In a medium bowl, combine the chicken, cornstarch, and black pepper. In a small bowl, whisk together the soy sauce, chicken broth, brown sugar, rice vinegar, and sesame oil. Set aside.
  2. Heat a large skillet or wok over medium-high heat. Add the oil and swirl to coat the pan. Add the chicken and cook, stirring constantly, until browned on all sides. Add the garlic and ginger and cook for 1 minute more.
  3. Add the bell peppers and onion and cook, stirring constantly, until softened. Add the reserved sauce and bring to a boil. Reduce heat to low and simmer for 5 minutes, or until the sauce has thickened.
  4. Add the cooked rice noodles and stir to combine. Cook for 2 minutes more, or until the noodles are heated through. Garnish with chopped green onions and serve immediately.

Conclusion

Chicken stir fry with rice noodles is a delicious and easy meal that can be enjoyed by the whole family. This dish is also a great way to get your daily dose of vegetables. If you are looking for a quick and easy weeknight meal, then this chicken stir fry is a great option.

Share:

Mexican Breakfast Tacos Chorizo And Egg

Mexican Breakfast Tacos Chorizo And Egg

Mexican Breakfast Tacos with Chorizo and Egg: A Savory Start to Your Day

Mexican breakfast tacos are a delicious and versatile way to start your day. Made with simple, fresh ingredients, these tacos are packed with flavor and can be easily customized to your liking. Whether you like them spicy or mild, vegetarian or meat-filled, there’s a breakfast taco out there for everyone.

In this recipe, we’ll be making chorizo and egg breakfast tacos. Chorizo is a spicy Mexican sausage that adds a delicious kick to these tacos, while the eggs add protein and a creamy texture.

Ingredients:

  • 1 pound chorizo sausage, removed from casing
  • 1 tablespoon olive oil
  • 1/2 cup chopped onion
  • 1/2 cup chopped green bell pepper
  • 1/2 cup chopped red bell pepper
  • 1 teaspoon chili powder
  • 1 teaspoon ground cumin
  • 1/2 teaspoon salt
  • 1/4 teaspoon black pepper
  • 8 eggs, beaten
  • 1/2 cup shredded cheese (cheddar, Monterey Jack, or a Mexican blend)
  • 8 corn tortillas
  • Salsa, guacamole, and sour cream, for serving

Instructions:

  1. Heat the olive oil in a large skillet over medium-high heat. Add the chorizo and cook, stirring occasionally, until browned and crispy. Remove the chorizo from the skillet and set aside.
  2. Add the onion, green bell pepper, and red bell pepper to the skillet. Cook, stirring occasionally, until the vegetables are softened. Add the chili powder, cumin, salt, and black pepper and cook for 1 minute more.
  3. Pour the beaten eggs into the skillet and cook, stirring constantly, until they are cooked through. Add the chorizo and cheese and stir to combine.
  4. Warm the tortillas in a skillet or on a griddle until they are soft and pliable. Fill each tortilla with the egg and chorizo mixture and top with salsa, guacamole, and sour cream. Serve immediately.

Conclusion:

Mexican breakfast tacos are a delicious and easy way to start your day. With their simple, fresh ingredients and endless possibilities for customization, there’s a breakfast taco out there for everyone. So next time you’re looking for a quick and satisfying breakfast, give these chorizo and egg tacos a try. You won’t be disappointed!

Share:

Chorizo Bacon Smashed Potato Breakfast Hash

Chorizo Bacon Smashed Potato Breakfast Hash

Chorizo Bacon Smashed Potato Breakfast Hash

Chorizo Bacon Smashed Potato Breakfast Hash

Chorizo Bacon Smashed Potato Breakfast Hash is a delicious and hearty breakfast dish that is perfect for a lazy weekend morning. It is made with potatoes, chorizo, bacon, and eggs, and it is seasoned with a variety of spices. This dish is sure to please everyone at your table.

Chorizo Bacon Smashed Potato Breakfast Hash is a great way to use up leftover potatoes. It is also a great way to get your day started with a protein-packed and satisfying breakfast. This dish is easy to make and can be tailored to your own taste preferences.

Ingredients:

  • 2 pounds of potatoes, peeled and cubed
  • 1/2 cup of olive oil
  • 1/2 cup of chopped chorizo
  • 1/2 cup of chopped bacon
  • 1/2 cup of chopped onion
  • 1/2 cup of chopped bell pepper
  • 1/2 teaspoon of garlic powder
  • 1/2 teaspoon of paprika
  • 1/2 teaspoon of salt
  • 1/4 teaspoon of black pepper
  • 4 eggs
  • 1/2 cup of shredded cheese
  • 1 tablespoon of chopped cilantro
  • Salsa, guacamole, and sour cream, for serving

Instructions:

  1. Preheat oven to 400 degrees F (200 degrees C).

  2. Place the potatoes in a large bowl and toss with the olive oil, chorizo, bacon, onion, bell pepper, garlic powder, paprika, salt, and black pepper.

  3. Spread the potato mixture onto a large baking sheet and bake for 25-30 minutes, or until the potatoes are tender and browned.

  4. Meanwhile, heat a large skillet over medium heat. Crack the eggs into the skillet and cook until they are cooked to your liking.

  5. Once the potatoes and eggs are cooked, spoon the potatoes onto a plate. Top with the eggs, cheese, cilantro, salsa, guacamole, and sour cream.

  6. Serve immediately.

Conclusion

Chorizo Bacon Smashed Potato Breakfast Hash is a delicious and hearty breakfast dish that is perfect for a lazy weekend morning. It is easy to make and can be tailored to your own taste preferences. So next time you are looking for a satisfying breakfast, give this recipe a try. You won’t be disappointed!

Share:

Brownie Cookie Sandwich Peanut Butter Frosting

Brownie Cookie Sandwich Peanut Butter Frosting

Brownie Cookie Sandwich Peanut Butter Frosting

Brownie Cookie Sandwich Peanut Butter Frosting

A Decadent Treat

This brownie cookie sandwich with peanut butter frosting is the ultimate indulgence for chocolate lovers! Gooey brownies sandwiched between soft and chewy cookies with a layer of creamy peanut butter frosting that adds sweetness, and a hint of saltiness. Whether you’re celebrating a special occasion or just looking to satisfy your sweet tooth, this dessert is sure to impress.

An Easy Recipe That’s Hard to Resist

The best part about this recipe is that it’s surprisingly easy to make. With a few simple ingredients, you can create a dessert that’s sure to be a hit among friends and family. So preheat your oven, grab your mixing bowls, and let’s get started!

Ingredients:

  • For the Brownies:
    • 1 cup (2 sticks) unsalted butter, melted
    • 1 cup granulated sugar
    • 2 large eggs
    • 1 cup all-purpose flour
    • 1/3 cup unsweetened cocoa powder
    • 1 teaspoon baking powder
    • 1/4 teaspoon salt
  • For the Peanut Butter Frosting:
    • 1 cup creamy peanut butter
    • 1/2 cup (1 stick) unsalted butter, softened
    • 2-3 cups confectioners’ sugar
    • 1-2 tablespoons milk
    • 1 teaspoon vanilla extract
  • For the Cookies:
    • 1 cup (2 sticks) unsalted butter, softened
    • 3/4 cup granulated sugar
    • 3/4 cup packed light brown sugar
    • 2 large eggs
    • 2 1/4 cups all-purpose flour
    • 1 teaspoon baking soda
    • 1 teaspoon salt

Instructions:

  1. Make the Brownies:
    Preheat oven to 350 degrees F. Grease a 9×13-inch baking pan. In a large bowl, whisk together the melted butter and sugar until smooth. Beat in the eggs one at a time. In a separate bowl, whisk together the flour, cocoa powder, baking powder, and salt. Gradually add the dry ingredients to the wet ingredients, mixing until just combined.

  2. Pour the brownie batter into the prepared pan and bake for 25-30 minutes or until a toothpick inserted into the center comes out with a few moist crumbs attached. Let the brownies cool completely in the pan.

Peanut Butter Frosting

  1. Make the Peanut Butter Frosting:
    While the brownies are cooling, make the frosting. In the bowl of a stand mixer or with a hand mixer, beat the peanut butter and softened butter together until smooth and creamy. Gradually beat in the confectioners’ sugar until light and fluffy. Add the milk and vanilla extract and mix until well combined. If the frosting is too thick, add more milk until desired consistency is reached.

  2. Make the Cookies:
    Preheat oven to 375 degrees F. Grease a baking sheet. In a large bowl, cream together the butter, granulated sugar, and brown sugar until light and fluffy. Beat in the eggs one at a time. In a separate bowl, whisk together the flour, baking soda, and salt. Gradually add the dry ingredients to the wet ingredients, mixing until just combined.

  3. Drop the cookie dough by rounded tablespoons onto the prepared baking sheet, spacing them about 2 inches apart. Bake for 10-12 minutes, or until the edges are just beginning to brown. Let the cookies cool on the baking sheet for a few minutes before transferring to a wire rack to cool completely.

  4. Assemble the Sandwiches:
    Once the cookies and brownies are completely cooled, it’s time to assemble the sandwiches. Spread a thin layer of peanut butter frosting on the bottom of one cookie. Place a brownie on top of the frosting and then spread another thin layer of frosting on top of the brownie. Top with another cookie and enjoy!

Brownie Sandwich Cookie Finished Product

Conclusion:

These brownie cookie sandwiches with peanut butter frosting are an indulgent treat that is sure to satisfy any chocoholic. With gooey brownies, soft and chewy cookies, and a creamy peanut butter frosting, these sandwiches are the perfect dessert for any occasion. Make them for your next party or gathering and watch them disappear!

Share:

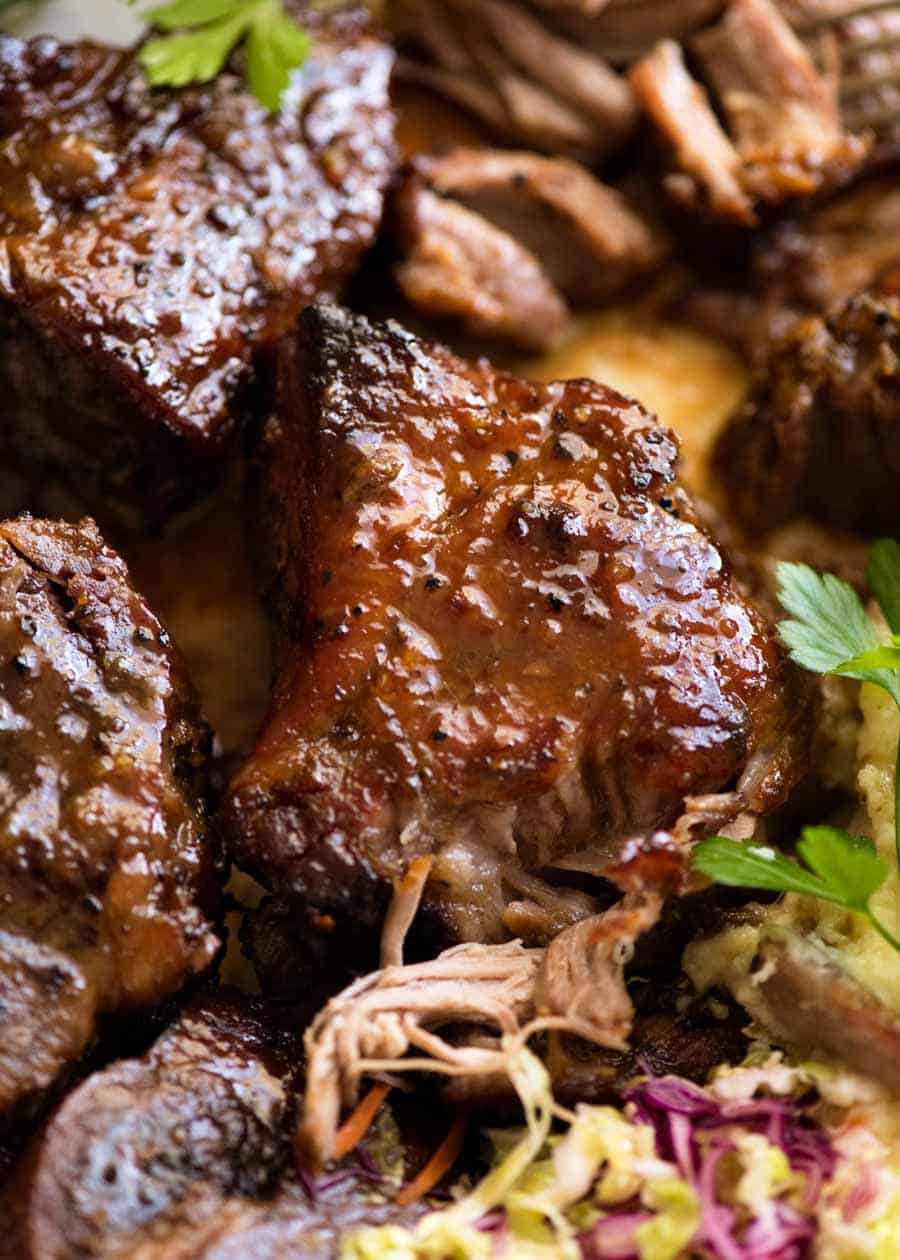
Brown Sugar Garlic Butter Roast Pork

Brown Sugar Garlic Butter Roast Pork

Brown Sugar Garlic Butter Roast Pork: A Sweet and Savory Treat

Brown Sugar Garlic Butter Roast Pork Dish

Brown Sugar Garlic Butter Roast Pork is a mouthwatering dish that combines the sweet and savory flavors of brown sugar, garlic, and butter with the tender and juicy texture of pork. It is a perfect meal for special occasions or a cozy family dinner. The aroma of roasted pork filled with garlicky goodness and a hint of sweetness will surely tantalize your taste buds and leave you craving for more.

Preparing Brown Sugar Garlic Butter Roast Pork

Brown Sugar Garlic Butter Roast Pork Ingredients

To make this delectable dish, you will need the following ingredients:

  • 1 pork shoulder roast (4-5 pounds)
  • 1/2 cup brown sugar
  • 1/4 cup garlic powder
  • 1/4 cup butter, softened
  • 1 tablespoon paprika
  • 1 teaspoon salt
  • 1/2 teaspoon black pepper
  • 1/4 cup water

Cooking Brown Sugar Garlic Butter Roast Pork

Brown Sugar Garlic Butter Roast Pork Cooking

  1. Preheat the oven to 325 degrees F (165 degrees C).
  2. In a small bowl, combine the brown sugar, garlic powder, melted butter, paprika, salt, and pepper.
  3. Rub the mixture all over the pork shoulder roast.
  4. Place the pork roast in a roasting pan and add the water.
  5. Cover the roasting pan with foil and roast in the preheated oven for 3-4 hours, or until the pork is tender and cooked through.
  6. Remove the foil and continue roasting for an additional 30 minutes, or until the pork is golden brown and caramelized.
  7. Let the pork rest for 10-15 minutes before slicing and serving.

Conclusion:

Brown Sugar Garlic Butter Roast Pork is a simple yet spectacular dish that is sure to impress your family and friends. The combination of sweet and savory flavors, along with the tender and juicy pork, makes this dish irresistible. Serve it with your favorite sides, such as roasted vegetables, mashed potatoes, or a simple green salad, and enjoy a delightful meal that will leave everyone asking for seconds.

Share:

Aloo Paratha Indian Potato Stuffed Flatbread

Aloo Paratha Indian Potato Stuffed Flatbread

Aloo Paratha: Indian Potato Stuffed Flatbread

Aloo Paratha is a classic Indian flatbread stuffed with spiced mashed potatoes. It is a delicious and satisfying dish that can be served for breakfast, lunch, or dinner. The flatbread is made with a simple dough of wheat flour, salt, and water. The dough is rolled out and filled with a spiced mashed potato mixture. The paratha is then cooked on a hot griddle until it is golden brown and crispy.

Source: https://tse1.mm.bing.net/th?q=Potato%20stuffed%20Flatbread

The History of Aloo Paratha

Aloo Paratha is a traditional Indian dish that has been enjoyed for centuries. It is believed to have originated in the Punjab region of India. The paratha is typically served with a side of yogurt, chutney, or pickle. It can also be served with a curry or dal.

Ingredients for Aloo Paratha:

  • 2 cups whole wheat flour
  • 1 teaspoon salt
  • 1/2 cup water
  • 4 potatoes, boiled and mashed
  • 1/2 teaspoon cumin seeds
  • 1/4 teaspoon turmeric powder
  • 1/4 teaspoon red chili powder
  • 1/4 teaspoon garam masala
  • 1/2 cup chopped cilantro
  • 1 tablespoon vegetable oil

Directions for Making Aloo Paratha:

  1. In a large bowl, combine the flour and salt. Add the water and knead to form a stiff dough.
  2. Divide the dough into 8 equal parts.
  3. In a separate bowl, combine the mashed potatoes, cumin seeds, turmeric powder, red chili powder, garam masala, and cilantro.
  4. Roll out each piece of dough into a circle. Place a spoonful of the potato mixture in the center of each circle.
  5. Fold the dough over the potato mixture and seal the edges.
  6. Heat the vegetable oil in a large skillet over medium heat.
  7. Cook the parathas for 2-3 minutes per side, or until golden brown and crispy.
  8. Serve the parathas hot with yogurt, chutney, or pickle.

Conclusion:

Aloo Paratha is a delicious and easy-to-make flatbread that is perfect for any occasion. It is a great way to use up leftover mashed potatoes, and it is also a healthy and satisfying meal. So next time you are looking for a quick and easy meal, give Aloo Paratha a try!

Share:

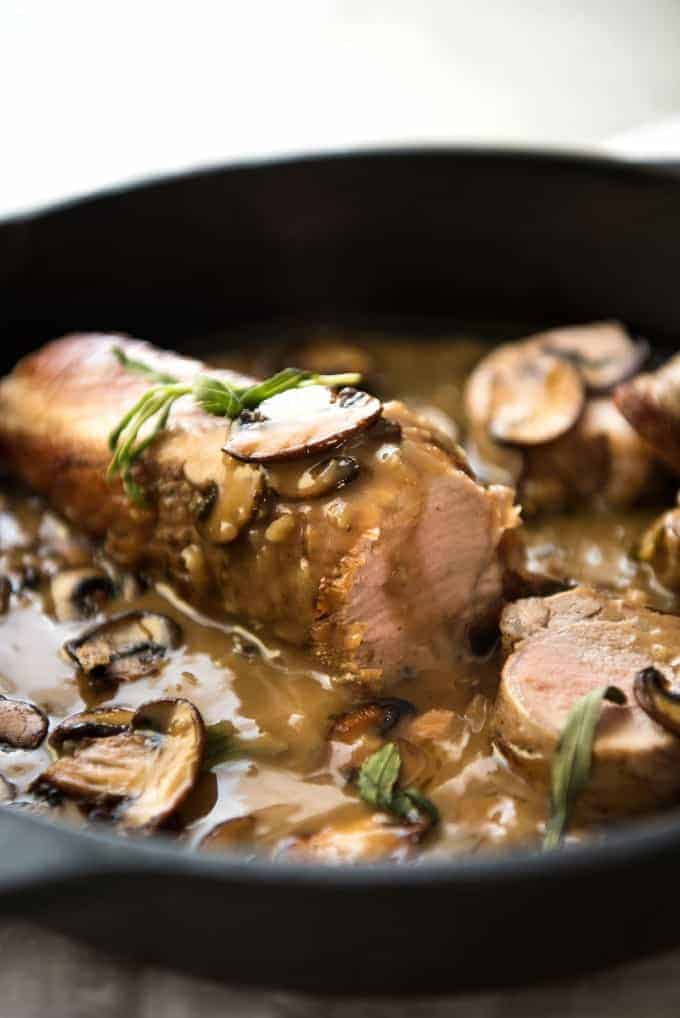
Pork Tenderloin With Creamy Marsala Sauce

Pork Tenderloin With Creamy Marsala Sauce

Pork Tenderloin With Creamy Marsala Sauce: A Delectable Dish for Special Occasions

Pork Tenderloin With Creamy Marsala Sauce

Pork tenderloin is a lean and flavorful cut of meat that is perfect for special occasions. When cooked properly, it is juicy and tender, with a slightly sweet flavor. Marsala sauce is a classic Italian sauce that is made with Marsala wine, mushrooms, and cream. It is a rich and flavorful sauce that pairs perfectly with pork.

This recipe for pork tenderloin with creamy Marsala sauce is easy to follow and can be made in just over an hour. It is a perfect dish for a romantic dinner or a special occasion meal.

Ingredients

  • 1 pound pork tenderloin, trimmed of fat
  • 1 tablespoon olive oil
  • 1/2 cup chopped onion
  • 1/2 cup chopped mushrooms
  • 1/2 cup Marsala wine
  • 1/2 cup chicken broth
  • 1/2 cup heavy cream
  • 1/4 cup grated Parmesan cheese
  • Salt and pepper to taste

Instructions

  1. Preheat oven to 400 degrees F (200 degrees C).
  2. Heat olive oil in a large skillet over medium heat.
  3. Add pork tenderloin and cook until browned on all sides.
  4. Remove pork tenderloin from skillet and set aside.
  5. Add onion and mushrooms to skillet and cook until softened.
  6. Add Marsala wine and chicken broth to skillet and bring to a boil.
  7. Reduce heat to low and simmer for 10 minutes, or until sauce has thickened.
  8. Add heavy cream and Parmesan cheese to sauce and stir until combined.
  9. Season with salt and pepper to taste.
  10. Add pork tenderloin back to skillet and spoon sauce over top.
  11. Bake in preheated oven for 20 minutes, or until pork tenderloin is cooked through.
  12. Serve immediately.

Conclusion

Pork tenderloin with creamy Marsala sauce is a delicious and elegant dish that is perfect for special occasions. It is easy to make and can be tailored to your own taste preferences. So next time you are looking for a special meal to impress your guests, give this recipe a try. You won’t be disappointed!

Share:

Sweet Soy Sauce Shredded Chicken Breast

Sweet Soy Sauce Shredded Chicken Breast

Sweet Soy Sauce Shredded Chicken Breast: A Savory and Versatile Dish

Sweet soy sauce shredded chicken breast is a popular dish in many Asian cuisines. It is a versatile dish that can be served as an appetizer, main course, or side dish. The chicken is first marinated in a sweet soy sauce mixture, then cooked until tender and shredded. It is often served with rice, noodles, or vegetables. The sweet and savory flavor of the chicken is sure to please everyone at the table.

Sweet soy sauce shredded chicken breast recipe

Ingredients:

  • 1 pound boneless, skinless chicken breasts
  • 1/4 cup soy sauce
  • 1/4 cup brown sugar
  • 1/4 cup honey
  • 1 tablespoon rice vinegar
  • 1 teaspoon ground ginger
  • 1/2 teaspoon garlic powder
  • 1/4 teaspoon black pepper
  • 1 tablespoon vegetable oil
  • 1 tablespoon cornstarch
  • 1/4 cup water

Instructions:

  1. In a large bowl, combine the chicken breasts, soy sauce, brown sugar, honey, rice vinegar, ginger, garlic powder, and black pepper. Stir to coat the chicken evenly. Cover and refrigerate for at least 30 minutes, or up to overnight.
  2. Heat the vegetable oil in a large skillet over medium heat. Add the chicken breasts and cook until browned on all sides. Reduce the heat to low and cook for an additional 10-12 minutes, or until the chicken is cooked through.
  3. Remove the chicken from the skillet and shred it with two forks. Set aside.
  4. In a small bowl, whisk together the cornstarch and water until smooth. Add the cornstarch mixture to the skillet and bring to a boil, stirring constantly. Reduce the heat to low and simmer for 1-2 minutes, or until the sauce has thickened.
  5. Add the shredded chicken back to the skillet and stir to coat in the sauce. Serve immediately with rice, noodles, or vegetables.

Conclusion:

Sweet soy sauce shredded chicken breast is a delicious and easy-to-make dish that is sure to please everyone at the table. It is a great way to use up leftover chicken, and it can be served as an appetizer, main course, or side dish. The sweet and savory flavor of the chicken is sure to be a hit with everyone who tries it. So next time you are looking for a quick and easy meal, give sweet soy sauce shredded chicken breast a try. You won’t be disappointed.

Share:

Pull Apart Bacon French Toast Muffins

Pull Apart Bacon French Toast Muffins

Pull Apart Bacon French Toast Muffins: A Delightful Breakfast Treat

Indulge in a delectable twist on the classic French toast with these pull-apart bacon French toast muffins. The blend of savory bacon, sweet French toast, and gooey cheese creates a delightful combination that is perfect for a hearty breakfast or brunch. With their pull-apart design, these muffins offer an interactive and fun-to-eat experience for your taste buds.

Preparation and Cooking:

Start by cooking the bacon until crispy and setting it aside. In a bowl, whisk together the eggs, milk, vanilla extract, cinnamon, and nutmeg. In a separate bowl, combine the bread cubes, cooked bacon, and shredded cheese. Pour the egg mixture over the bread mixture and stir until evenly coated. Grease a muffin tin and divide the mixture evenly among the muffin cups. Bake in a preheated oven at 350°F for 25-30 minutes, or until golden brown. Serve warm with maple syrup, butter, or your favorite toppings.

Ingredients:

  • 1 pound of thick-cut bacon
  • 1 loaf (1 pound) of French bread, cubed
  • 1 cup of shredded cheddar cheese
  • 1/2 cup of shredded mozzarella cheese
  • 10 large eggs
  • 2 cups of milk
  • 1 teaspoon of vanilla extract
  • 1/2 teaspoon of ground cinnamon
  • 1/4 teaspoon of ground nutmeg
  • Maple syrup, butter, or other toppings (optional)

Conclusion:

These pull-apart bacon French toast muffins are a guaranteed crowd-pleaser, whether you’re serving them for breakfast, brunch, or as a fun snack. Their delicious flavors and interactive design make them a memorable addition to any meal. Enjoy this delightful treat with your loved ones and savor every bite of this culinary masterpiece.

Pull Apart Bacon French Toast Muffins
Preparation and Cooking
Ingredients
Conclusion

Share:

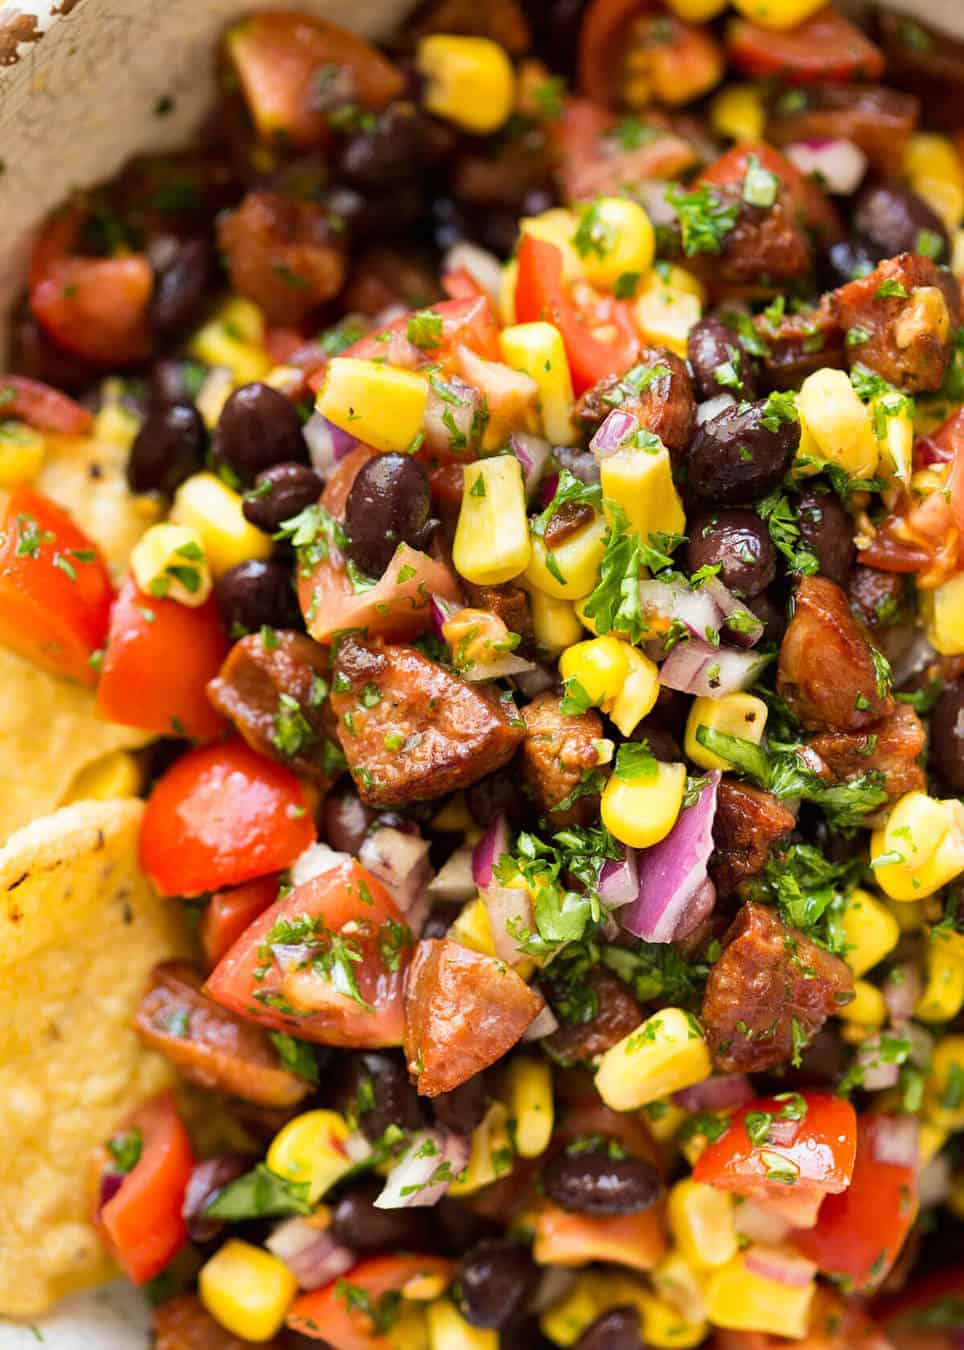
Chorizo Black Bean And Corn Salsa

Chorizo Black Bean And Corn Salsa

Chorizo Black Bean and Corn Salsa: A Colorful and Flavorful Dip or Topping

If you’re looking for a dip or topping that is both colorful and flavorful, look no further than chorizo black bean and corn salsa. This easy-to-make salsa is packed with fresh and zesty ingredients that will tantalize your taste buds. The chorizo adds a smoky and slightly spicy flavor, while the black beans add a hearty and protein-rich addition. The corn adds a touch of sweetness, and the chopped tomatoes, onions, and cilantro provide a refreshing and tangy balance.

This salsa is perfect for serving with tortilla chips, as a topping for tacos or burritos, or as a side dish for grilled fish or chicken. It’s also a great way to add a pop of color and flavor to your favorite Mexican-inspired dishes.

Chorizo Black Bean and Corn Salsa

Ingredients:

  • 1 pound chorizo, cooked and crumbled
  • 1 can (15 ounces) black beans, rinsed and drained
  • 1 can (15 ounces) corn kernels, drained
  • 1 cup chopped tomatoes
  • 1 cup chopped onion
  • 1/2 cup chopped cilantro
  • 1 lime, juiced
  • 1 teaspoon salt
  • 1/2 teaspoon black pepper

Instructions:

  1. In a medium bowl, combine all of the ingredients. Stir until well combined.
  2. Cover the salsa and refrigerate for at least 30 minutes before serving. This will allow the flavors to meld together.

Conclusion:

Chorizo black bean and corn salsa is a delicious and versatile dish that can be enjoyed in many different ways. It’s a great way to add a pop of color and flavor to your next party or potluck.

Tips:

  • For a spicier salsa, use spicy chorizo.
  • If you don’t have any cooked chorizo, you can cook it in a skillet over medium heat until it is browned.
  • You can also add other ingredients to this salsa, such as diced avocado, diced bell pepper, or chopped jalapenos.
  • This salsa will keep for up to 3 days in the refrigerator.
Share:

Leftover Mashed Potato Cheese Bacon Cakes

Leftover Mashed Potato Cheese Bacon Cakes

Leftover Mashed Potato Cheese Bacon Cakes

Leftover mashed potato, cheese, and bacon cakes

Leftover mashed potato cheese bacon cakes are a delicious and easy way to use up leftover mashed potatoes. They’re crispy on the outside and fluffy on the inside, with a cheesy bacon filling. You can serve them for breakfast, lunch, or dinner.

To make leftover mashed potato cheese bacon cakes, you’ll need the following ingredients:

  • 2 cups leftover mashed potatoes
  • 1/2 cup shredded cheddar cheese
  • 1/2 cup cooked bacon, crumbled
  • 1 egg
  • 1/4 cup flour
  • 1 teaspoon baking powder
  • 1/2 teaspoon salt
  • 1/4 teaspoon pepper
  • Vegetable oil, for frying

Instructions:

  1. In a large bowl, combine the leftover mashed potatoes, cheddar cheese, bacon, egg, flour, baking powder, salt, and pepper. Mix until well combined.

  2. Form the potato mixture into 8-10 cakes.

  3. Heat a large skillet over medium heat. Add vegetable oil to the skillet and swirl to coat.

  4. Once the oil is hot, add the potato cakes and cook for 3-4 minutes per side, or until golden brown and cooked through.

  5. Serve immediately.

Tips:

  • You can use any type of leftover mashed potatoes in this recipe. If your mashed potatoes are too thick, you may need to add a little milk or cream to make them more spreadable.
  • You can also add other ingredients to your potato cakes, such as diced onion, bell pepper, or zucchini.
  • Serve your potato cakes with your favorite dipping sauce, such as ketchup, ranch dressing, or sour cream.

Conclusion:

Leftover mashed potato cheese bacon cakes are a delicious and easy way to use up leftover mashed potatoes. They’re crispy on the outside and fluffy on the inside, with a cheesy bacon filling. You can serve them for breakfast, lunch, or dinner.

Share:

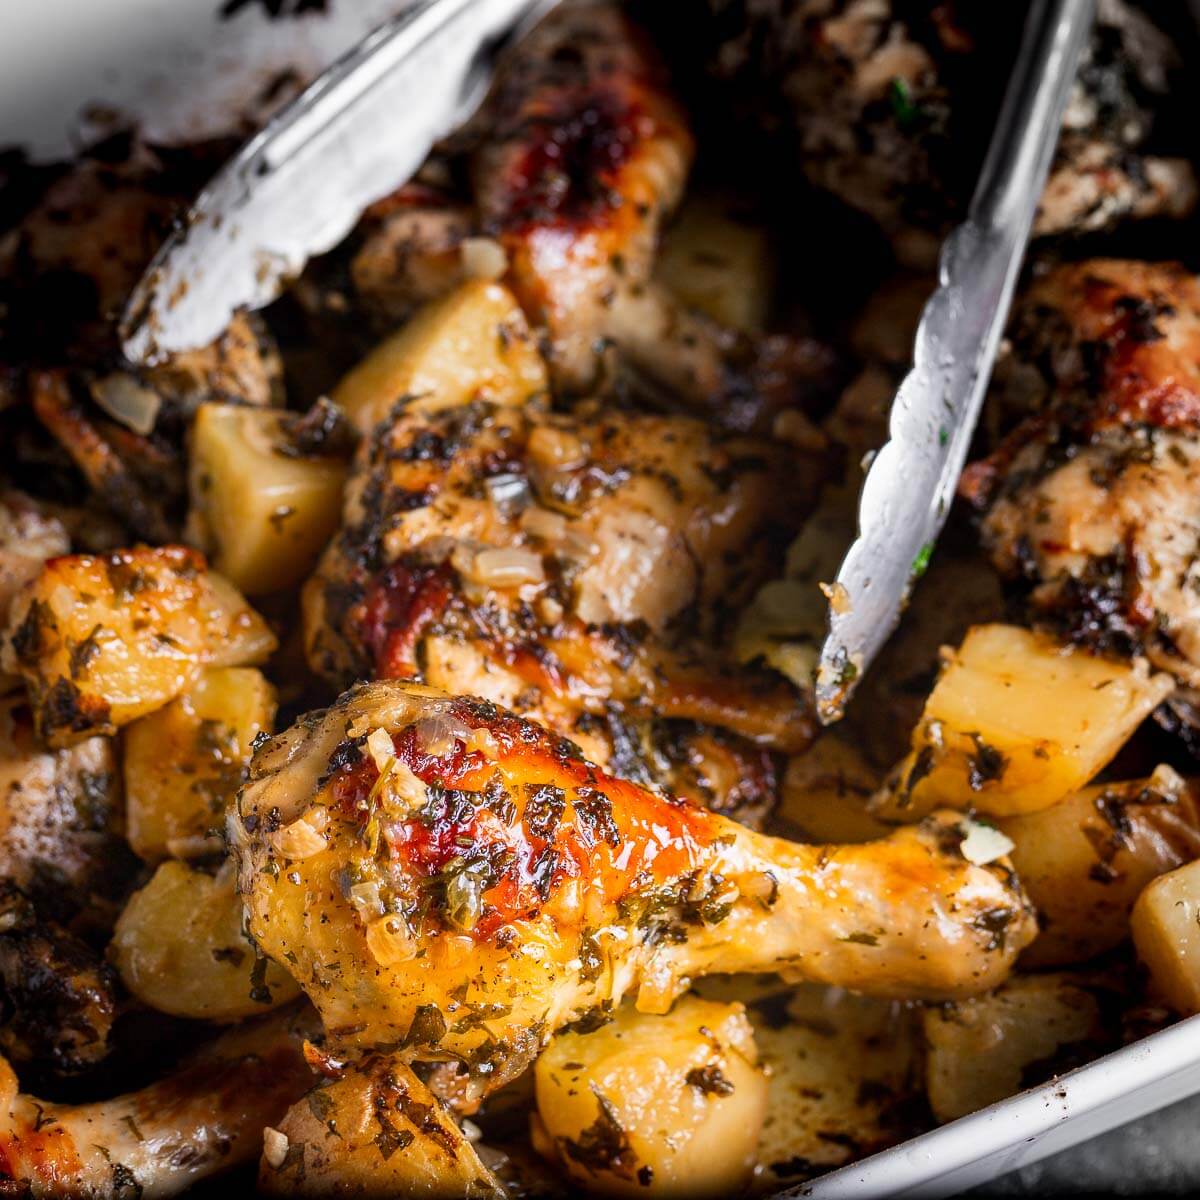
Italian Baked Chicken Potatoes Cherry Tomatoes

Italian Baked Chicken Potatoes Cherry Tomatoes

Italian Baked Chicken, Potatoes, and Cherry Tomatoes: A Flavorful One-Pan Meal

Italian Baked Chicken, Potatoes, and Cherry Tomatoes

This Italian-inspired dish combines tender chicken, roasted potatoes, and juicy cherry tomatoes in a flavorful sauce made with olive oil, garlic, herbs, and spices. It’s a complete meal in one pan that’s easy to prepare and packed with Mediterranean flavors.

A Delightful Combination of Flavors

Chicken, Potatoes, and Cherry Tomatoes in a Pan

The chicken is marinated in a mixture of olive oil, lemon juice, garlic, and Italian herbs, infusing it with a zesty and aromatic flavor. The potatoes and cherry tomatoes are tossed in a similar mixture before being roasted, creating a medley of colors and textures. The sauce that forms during the baking process combines the flavors of the chicken, potatoes, tomatoes, and herbs into a delicious and savory dish.

Ingredients:

  • 1 cup of all-purpose flour
  • salt and fresh pepper
  • 3 lbs of boneless, skinless chicken breasts
  • 2 tablespoons of olive oil
  • 4 cloves of minced garlic, divided
  • 2 teaspoons of dried basil
  • 1 teaspoon of dried oregano
  • 1/2 teaspoon of dried thyme
  • 1 lemon, zested and juiced
  • 2 cups of chicken broth
  • 1 cup of sliced cherry tomatoes
  • 1 pound of small red potatoes, halved or quartered
  • 1 tablespoon of fresh chopped parsley

Instructions:

  1. Preheat oven to 400°F (200°C).

  2. In a shallow dish, combine the flour, salt, and pepper. Coat the chicken breasts in the seasoned flour.

  3. In a large skillet over medium heat, heat the olive oil. Brown the chicken breasts on all sides, about 3-4 minutes per side. Remove from the skillet and set aside.

  4. In the same skillet, add the remaining olive oil and garlic. Cook over medium heat until fragrant, about 1 minute.

  5. Add the basil, oregano, thyme, lemon zest, and juice. Stir to combine.

  6. Pour the chicken broth into the skillet and bring to a simmer. Return the chicken breasts to the skillet. Reduce heat to low, cover, and simmer for 15-20 minutes, or until the chicken is cooked through.

  7. Add the cherry tomatoes and potatoes to the skillet. Stir to coat in the sauce. Cover and cook for 10-15 minutes, or until the vegetables are tender.

  8. Transfer the skillet to the oven and bake for 15-20 minutes, or until the chicken is golden brown and the vegetables are roasted.

  9. Sprinkle with fresh parsley before serving.

Conclusion:

Italian Baked Chicken, Potatoes, and Cherry Tomatoes on a Plate

This Italian Baked Chicken with Potatoes and Cherry Tomatoes is a satisfying and flavorful meal that’s perfect for a weeknight dinner. It’s easy to prepare and packed with Mediterranean flavors. Serve it with a side of crusty bread or a simple salad for a complete and satisfying meal.

Share:

One Pan Rotisserie Chicken Potato Gratin

One Pan Rotisserie Chicken Potato Gratin

One Pan Rotisserie Chicken Potato Gratin: A Comforting and Homestyle Dish

One Pan Rotisserie Chicken Potato Gratin

Rotisserie chicken is a convenient and versatile ingredient that can be used in a variety of dishes. One of the most popular ways to use rotisserie chicken is in a potato gratin. This classic French dish is made with layers of thinly sliced potatoes, cheese, and cream. Chicken is a hearty addition to this dish, making it a perfect meal for a cold night. With a few simple steps and ingredients, you can easily enjoy this comforting and homestyle dish.

Ingredients:

  • 1 rotisserie chicken
  • 3 pounds russet potatoes
  • 8 tablespoons butter, divided
  • 1 onion, sliced
  • 2 garlic cloves, minced
  • 1/2 cup flour
  • 3 cups milk
  • 1 cup shredded cheddar cheese
  • 1 cup shredded mozzarella cheese
  • 1/4 teaspoon salt
  • 1/4 teaspoon black pepper
  • 1/4 cup chopped fresh parsley

Instructions:

  1. Shred the rotisserie chicken by removing the skin. Debone the chicken and pull or cut the meat off the bones. Set aside.
  2. Peel and slice the potatoes very thinly, about 1/8-inch thick.
  3. In a large skillet, melt 4 tablespoons of butter over medium-low heat. Add the onion and garlic to the skillet and cook until softened, about 5 minutes.
  4. Add the flour to the skillet and stir to combine. Cook for 1 minute, or until the flour is browned.
  5. Gradually whisk the milk into the skillet, stirring constantly. Bring the mixture to a simmer and cook for 2 minutes, or until thickened.
  6. Remove the pan from the heat and stir in the cheddar and mozzarella cheeses. Season with salt and pepper.
  7. In a 9×13-inch baking dish, spread a thin layer of the cheese sauce. Top with a layer of potato slices, then a layer of shredded chicken. Repeat layers until all of the ingredients are used up, ending with a layer of cheese sauce.
  8. Finally, spread the remaining butter on top and sprinkle with chopped parsley.
  9. Bake the gratin in a preheated 375°F oven for 30-35 minutes, or until the potatoes are tender and the top is golden brown.
  10. Let the gratin cool for 5 minutes before serving.

Conclusion:

One pan rotisserie chicken potato gratin is an easy and delicious combination of classic comfort food. Layer of roasted potato and a creamy cheese sauce, all topped with tender pieces of rotisserie chicken. This casserole is sure to be a hit at any table and is perfect for any occasion. It is an easy and economical way to feed your family and friends.

Share:

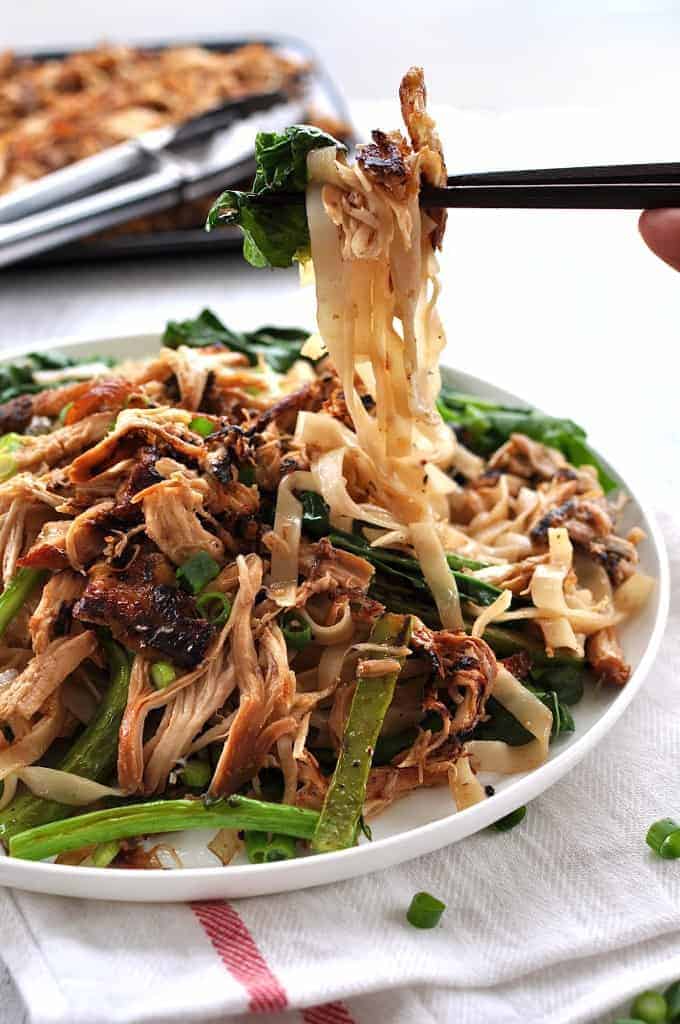
Crispy Shredded Chicken Noodle Stir Fry

Crispy Shredded Chicken Noodle Stir Fry

Crispy Shredded Chicken Noodle Stir Fry: A Flavorful and Easy Weeknight Meal

Crispy Shredded Chicken Noodle Stir Fry

Who says delicious and easy can’t go together? This Crispy Shredded Chicken Noodle Stir Fry is a testament to the fact that quick and simple meals can still be bursting with flavor and texture. In just 30 minutes, you’ll have a delectable stir fry that’s perfect for a busy weeknight dinner or a quick lunch. The crispy shredded chicken is tossed with a savory sauce, vibrant vegetables, and chewy noodles, creating a dish that’s both satisfying and exciting to the taste buds. So, say goodbye to bland and boring weeknight meals, and embrace the simplicity and deliciousness of this Crispy Shredded Chicken Noodle Stir Fry.

Ingredients:

  • 1 pound boneless, skinless chicken breasts, cut into thin strips
  • 1/2 cup cornstarch
  • 1/4 cup soy sauce
  • 1/4 cup rice vinegar
  • 1/4 cup brown sugar
  • 1 tablespoon grated fresh ginger
  • 1 tablespoon minced garlic
  • 2 tablespoons vegetable oil
  • 1 red bell pepper, cut into thin strips
  • 1 green bell pepper, cut into thin strips
  • 1 onion, cut into thin strips
  • 1 carrot, cut into thin strips
  • 1 head broccoli, cut into florets
  • 1 (12-ounce) package of ramen noodles, cooked according to package directions and drained
  • Sesame seeds, for garnish (optional)

Instructions:

  1. In a medium bowl, combine the cornstarch, soy sauce, rice vinegar, brown sugar, ginger, and garlic. Stir until the sauce is smooth.
  2. Add the chicken strips to the bowl and coat them thoroughly with the sauce. Cover the bowl and refrigerate for at least 30 minutes, or up to overnight.
  3. Heat the vegetable oil in a large skillet or wok over medium-high heat.
  4. Remove the chicken from the marinade and shake off any excess. Add the chicken to the hot oil and cook, stirring constantly, until golden brown and crispy. Remove the chicken from the skillet and set aside.
  5. Add the bell peppers, onion, and carrot to the skillet and cook, stirring constantly, until they are tender-crisp, about 5 minutes.
  6. Add the broccoli florets and cook until they are bright green and tender, about 2 minutes.
  7. Drain the noodles and add them to the skillet. Toss to combine.
  8. Return the chicken to the skillet and stir to combine.
  9. Serve the stir fry immediately, garnished with sesame seeds if desired.

Conclusion:

With its crispy chicken, tender vegetables, and chewy noodles, this stir fry is a meal that everyone will love. Not only is it delicious, but it’s also incredibly easy to make, making it the perfect choice for busy weeknights or quick lunches. So, next time you’re short on time but craving something flavorful and satisfying, give this Crispy Shredded Chicken Noodle Stir Fry a try. You won’t be disappointed!

Share:

Whole Egg Bacon And Avocado Quesadilla

Whole Egg Bacon And Avocado Quesadilla

Whole Egg Bacon And Avocado Quesadilla

Quesadilla is a Mexican dish consisting of a tortilla filled with a variety of ingredients, such as cheese, beans, and meat. The quesadilla is then folded in half and grilled until the cheese melts. Quesadillas can be served with various toppings and sides, such as guacamole, salsa, and sour cream. One popular quesadilla variation is the whole egg bacon and avocado quesadilla.

This quesadilla is filled with eggs, bacon, and avocado, and it is a delicious and satisfying meal that is perfect for breakfast, lunch, or dinner. Avocado is a fruit that has a creamy and rich flavor. It is a good source of healthy fats, fiber, and vitamins. Avocados can be added to a variety of dishes, including quesadillas, salads, and sandwiches.

Ingredients

  • 1 tablespoon olive oil
  • 1/2 cup chopped onion
  • 1/2 cup chopped green bell pepper
  • 1/2 cup chopped red bell pepper
  • 1/4 teaspoon salt
  • 1/4 teaspoon black pepper
  • 1 (10-inch) flour tortilla
  • 1/2 cup shredded cheddar cheese
  • 1/2 cup cooked egg
  • 1/2 cup chopped bacon
  • 1/2 cup sliced avocado
  • Guacamole, for serving (optional)
  • Salsa, for serving (optional)
  • Sour cream, for serving (optional)

Instructions

  1. Heat the olive oil in a large skillet over medium heat. Add the onion, green bell pepper, and red bell pepper and cook until softened.
  2. Season with salt and black pepper. Spread the shredded cheddar cheese evenly over the tortilla. Top with the cooked egg, bacon, avocado, and cooked vegetables.
  3. Fold the tortilla in half and cook until the cheese is melted and the tortilla is golden brown.
  4. Serve with guacamole, salsa, and sour cream, if desired.

Conclusion

The whole egg bacon and avocado quesadilla is a delicious and satisfying meal that is perfect for any occasion. It is easy to make and can be customized to your liking. So next time you are looking for a quick and easy meal, give this quesadilla a try.

Share:

Kfc Oven Baked Fried Chicken Tenders

Kfc Oven Baked Fried Chicken Tenders

KFC Oven Baked Fried Chicken Tenders: A Healthier Alternative to Traditional Fried Chicken

KFC’s Oven Baked Fried Chicken Tenders offer a healthier alternative to traditional fried chicken while maintaining the delicious taste that KFC is known for.

KFC Oven Baked Fried Chicken Tenders

Made with 100% real chicken breast, these tenders are coated with a crispy breading that is baked in an oven instead of being fried in oil. The result is a chicken tender that is tender and juicy on the inside and crispy on the outside, with significantly less fat and calories than traditional fried chicken.

## Ingredients:

– 1 pound boneless, skinless chicken breasts, cut into 1-inch pieces
– 1 cup all-purpose flour
– 1/2 cup cornmeal
– 1/4 cup paprika
– 1 tablespoon garlic powder
– 1 tablespoon onion powder
– 1 tablespoon salt
– 1 teaspoon black pepper
– 1/2 cup vegetable oil
– 1/4 cup melted butter
– 1 cup hot sauce
– 1/2 cup honey

## Instructions:

1. Preheat oven to 400 degrees F (200 degrees C).
2. In a large bowl, combine chicken, flour, cornmeal, paprika, garlic powder, onion powder, salt, and pepper. Toss to coat evenly.
3. In a separate bowl, whisk together the oil and butter. Add chicken to the bowl and toss to coat.
4. Place chicken on a baking sheet and bake for 15 minutes, or until golden brown and cooked through.
5. In a small bowl, combine hot sauce and honey. Brush over chicken and serve immediately.

## Conclusion:

KFC Oven Baked Fried Chicken Tenders are a delicious and healthier alternative to traditional fried chicken. They are easy to make and can be enjoyed as a snack or as part of a meal. With less fat and calories than traditional fried chicken, these tenders are a great option for those who are looking for a healthier way to enjoy their favorite fried chicken.

Share:

Jamie Olivers Chicken Milk Seriously Delish

Jamie Olivers Chicken Milk Seriously Delish

Oliver’s Chicken Milk: Seriously Delish

![](img >)source=’https://tse1.mm.bing.net/th?q=Oliver%27s+Chicken+Milk%3A+Seriously+Delish

In a world filled with tantalizing treats, Oliver’s Chicken Milk stands out as a true gem, a culinary delight that has captivated taste buds around the globe. With its creamy texture, rich flavor, and enchanting aroma, this exceptional confection is not just a mere sweet but an experience that lingers long after the last bite.

A Journey of Flavors

![](img >)source=’https://tse1.mm.bing.net/th?q=A+Journey+of+Flavors

Oliver’s Chicken Milk embarks on a sensational expedition of flavors, promising an adventure for the senses. Each sip unveils a symphony of tastes, a harmonious blend of sweetness and subtle hints of spice. The velvety smoothness caresses the palate, while the delicate notes of vanilla and cinnamon dance upon the tongue, leaving an irresistible trail of delight.

Product Variants

![](img >)source=’https://tse1.mm.bing.net/th?q=Product+Variants

The Oliver’s Chicken Milk family boasts a diverse range of variants, catering to various preferences and dietary needs. From the classic Original flavor to the indulgent Chocolate and decadent Coffee varieties, there’s a perfect match for every sweet tooth. For those seeking a healthier alternative, the Sugar-Free option provides a guilt-free indulgence without compromising on taste.

Conclusion

![](img >)source=’https://tse1.mm.bing.net/th?q=Conclusion

Oliver’s Chicken Milk is a culinary masterpiece, a testament to the art of confectionery. Its velvety texture, rich flavors, and captivating aroma have earned it a place in the hearts of sweet enthusiasts worldwide. Whether enjoyed as a standalone treat or incorporated into delectable desserts, Oliver’s Chicken Milk delivers an experience that is truly sensational. Treat yourself to a taste of this exquisite creation and embark on a journey of flavors that will leave you craving for more.

Share:

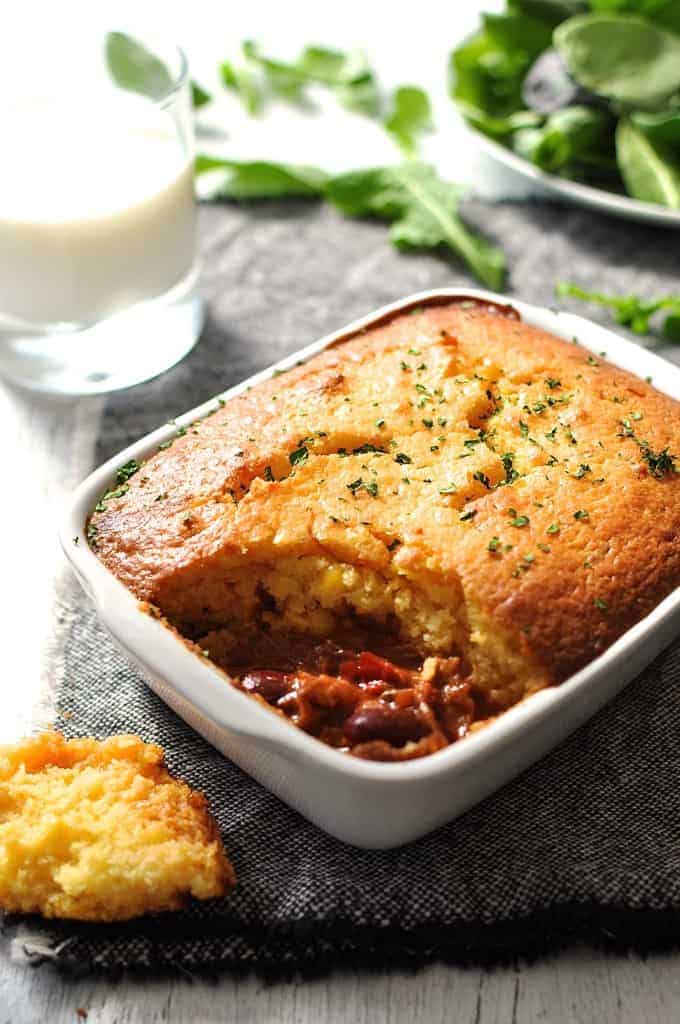
Chili Con Carne Corn Bread Pie

Chili Con Carne Corn Bread Pie

Chili Con Carne Corn Bread Pie: A Hearty and Flavorful Dish

This hearty and flavorful dish is perfect for a cold winter day. The chili con carne is made with ground beef, onions, peppers, tomatoes, and spices. The cornbread topping is light and fluffy, and it adds a delicious sweetness to the dish.

Chili Con Carne Corn Bread Pie

Chili con carne is a classic Mexican dish that is made with ground beef, onions, peppers, tomatoes, and spices. It is typically served with rice or tortillas, but it can also be used as a topping for cornbread or other breads. Cornbread is a type of bread that is made with cornmeal, flour, sugar, baking powder, and salt. It is typically baked in a skillet or a cake pan, and it can be served with butter, honey, or syrup.

Ingredients

For the Chili Con Carne:

  • 1 pound ground beef
  • 1 onion, chopped
  • 1 green bell pepper, chopped
  • 1 red bell pepper, chopped
  • 1 can (15 ounces) tomato sauce
  • 1 can (15 ounces) diced tomatoes
  • 1 can (15 ounces) tomato paste
  • 1 teaspoon chili powder
  • 1 teaspoon cumin
  • 1/2 teaspoon salt
  • 1/4 teaspoon black pepper

For the Cornbread Topping:

  • 1 cup cornmeal
  • 1 cup all-purpose flour
  • 1/2 cup sugar
  • 2 teaspoons baking powder
  • 1/2 teaspoon salt
  • 1 cup milk
  • 1 egg
  • 1/4 cup melted butter

Instructions

  1. To make the chili con carne, brown the ground beef in a large skillet over medium heat. Drain the fat.
  2. Add the onion, green bell pepper, and red bell pepper to the skillet and cook until softened.
  3. Stir in the tomato sauce, diced tomatoes, tomato paste, chili powder, cumin, salt, and black pepper. Bring to a simmer and cook for 15 minutes, or until the chili has thickened.
  4. To make the cornbread topping, whisk together the cornmeal, flour, sugar, baking powder, and salt in a large bowl.
  5. In a separate bowl, whisk together the milk, egg, and melted butter.
  6. Add the wet ingredients to the dry ingredients and stir until just combined. Do not overmix.
  7. Pour the cornbread batter over the chili con carne in a 9×13 inch baking dish.
  8. Bake at 350 degrees Fahrenheit for 30-35 minutes, or until the cornbread is golden brown and a toothpick inserted into the center comes out clean.

Conclusion

Chili con carne corn bread pie is a delicious and easy-to-make meal that is perfect for a family dinner. It is also a great dish to serve at a potluck or party.

Share:

Ham Cheese French Toastie Roll Ups

Ham Cheese French Toastie Roll Ups

Ham Cheese French Toast Roll Ups

These easy-to-make roll-ups are a creative, delicious way to start your day. They’re made with just a few simple ingredients and are the perfect grab-and-go breakfast for busy mornings. French Toast Roll Ups have a crispy golden shell, a gooey cheesy center, and a pop of flavor from the ham. These delightful treats are great for parties, picnics, or just a quick snack.

Ingredients:

  • 1 package (8 ounce) cream cheese, softened
  • 1 cup shredded cheddar cheese
  • 1/2 cup diced ham
  • 1/2 cup chopped green onions
  • 1/4 cup chopped parsley
  • 1/4 teaspoon salt
  • 1/8 teaspoon black pepper
  • 12 slices bread
  • 1/2 cup butter, melted
  • 1/2 cup maple syrup

Instructions:

  1. In a medium bowl, combine the cream cheese, cheddar cheese, ham, green onions, parsley, salt, and pepper. Mix until well combined.
  2. Spread about 1/4 cup of the cream cheese mixture onto each bread slice.
  3. Starting from one corner, roll up the bread and place it on a greased baking sheet.
  4. Repeat with the remaining bread slices and the cream cheese mixture.
  5. Brush the tops of the roll-ups with the melted butter.
  6. Bake in a preheated oven at 350 degrees F for 15-20 minutes, or until golden brown.
  7. Serve with maple syrup.

Conclusion:

These Ham Cheese French Toast Roll Ups are the perfect breakfast treat! They are easy to make, delicious and filling. You can also add some fruit, such as blueberries or strawberries, to the filling for an extra burst of flavor.

Share:

What Recipes Do You Want In 2023

What Recipes Do You Want In 2023

What Recipes Do You Want In 2023?

As we enter a new year, it’s time to start thinking about what kind of recipes we want to try in 2023. Whether you’re looking for new and exciting dishes to add to your repertoire, or you’re simply looking for ways to make your favorite recipes even better, there are plenty of resources available to help you find the perfect recipes for your needs.

Comforting slow-cooker white chicken chili.

Comforting Slow-Cooker White Chicken Chili

If you’re looking for a simple and delicious way to warm up on a cold winter day, this slow-cooker white chicken chili is the perfect recipe. Made with chicken breasts, white beans, corn, and tomatoes, this chili is packed with flavor and protein. Plus, it’s easy to make ahead of time, so you can have a hot and delicious meal ready whenever you need it.

Easy apple pie.

Easy Apple Pie

Apple pie is a classic American dessert that’s perfect for any occasion. This easy apple pie recipe uses a pre-made pie crust, so you can have a delicious apple pie on the table in no time. Just fill the crust with your favorite apples, spices, and sugar, and bake until the crust is golden brown and the filling is bubbling.

5-Ingredient chicken parmesan.

5-Ingredient Chicken Parmesan

Chicken parmesan is a delicious and easy-to-make Italian dish that’s perfect for a weeknight dinner. This 5-ingredient chicken parmesan recipe uses boneless, skinless chicken breasts, marinara sauce, Parmesan cheese, and mozzarella cheese. Simply coat the chicken breasts in marinara sauce, and then top with Parmesan and mozzarella cheese. Bake until the chicken is cooked through and the cheese is melted and bubbly.

Healthy breakfast smoothie.

Healthy Breakfast Smoothie

If you’re looking for a quick and healthy way to start your day, this healthy breakfast smoothie is the perfect recipe. Made with yogurt, fruit, and greens, this smoothie is packed with nutrients and antioxidants. Plus, it’s delicious and easy to make, so you can have a healthy breakfast on the go in no time.

Conclusion

These are just a few of the many delicious recipes that you can try in 2023. With so many different options available, you’re sure to find the perfect recipes for your needs. So get cooking and enjoy!

Share:

Popular Recipes

Labels

Blog Archive

Featured Post

Recipe Sweet Spicy Tofu

Tofu, with its versatile nature, offers a canvas for culinary creativity. One delightful rendition of this ingredient is the Spicy Sweet Tof...